Field review: Canon EOS 6D, NA-6D housing and Zen DP-100 port
In use
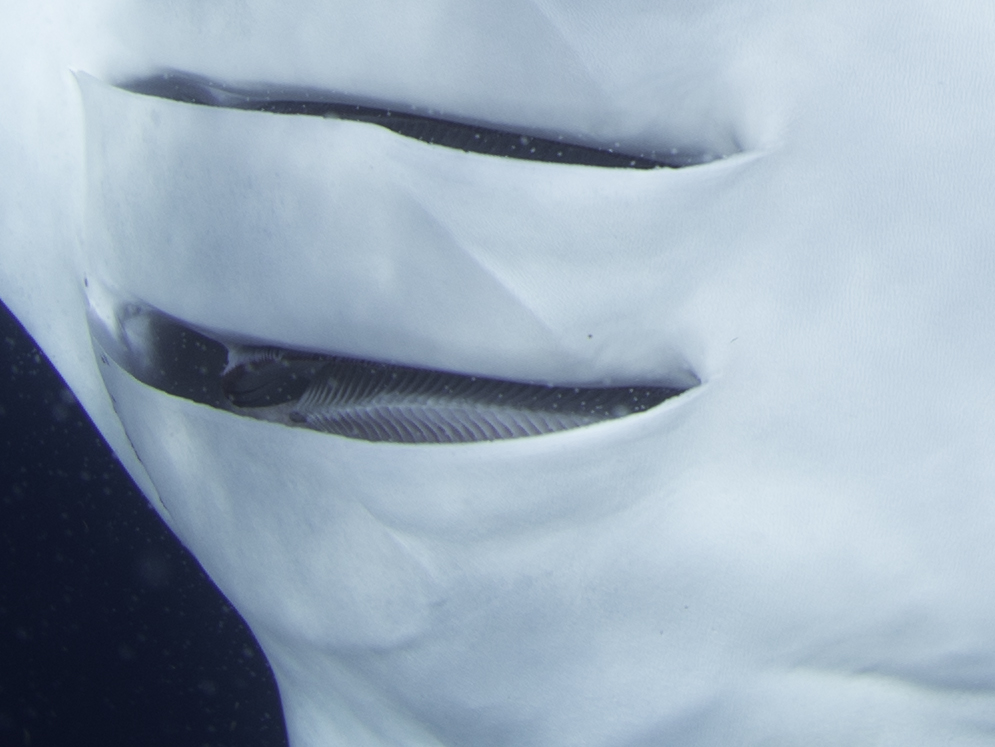
As mentioned above, I was able to spend a week with the set up at Isla Mujeres, Mexico during the Wetpixel Ultimate Whale Shark expedition. The animals are moving, often quite quickly and are so big that using strobes presents several significant drawbacks, and little advantage.
Hence all the images shot for the review were shot using ambient light only. From a practical standpoint, this presented challenges. The most visually pleasing perspectives for capturing whale sharks (and to an extent mantas too) is either head on or from underneath in silhouette. This meant that exposure settings would vary widely depending on which perspective was being shot.
All the diving was on breath hold, the shooting has to be fast and quick. There is little time to set up the camera or compose images.
Camera and lens performance
The EOS 6D was relatively straightforward to set up and the controls were fairly straightforward to get used too. Canon’s menu system is pretty intuitive and with the instruction manual and camera body available during a (24 hour) flight I was able to get it set up and working the way I wanted it to.
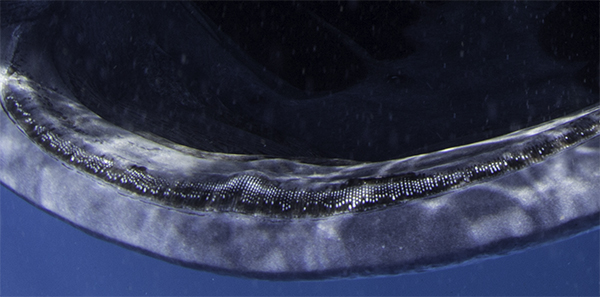
Image quality was good but not excellent (bear in mind I am used to a D800). The camera is capable of pretty good fine detail but it is simply not in the same league as that of the D800. I must admit that this is not a fair comparison.
Overall, I was mostly happy with the results out of the camera, I just felt that they would have been better with a higher resolution camera!
Similarly, it proved fairly competent in terms of tonal range and was actually quite good at sunbursts, but again not as good as the D800. I must confess that I did not do any high ISO shooting so can’t really comment on noise or lack thereof. Certainly in the ISO range of 100-400, there was no discernible noise.
Focus with large animals can be problematic. With the whale sharks, the volume of zooplankton in the water and their movement means that AF can often hunt and lock on to the “wrong” area. Hence, many photographers preset their AF. The photographer simply focuses on something that is far enough away to simulate the distance between them and the animal (the ends of their fins for example) and sets the focus to this. This is then locked off by putting the camera into its manual focus mode. An alternative technique is to decouple the AF from the shutter release by setting the camera to use the AF-ON button. I chose to do the latter, and I was using it actively to focus throughout the trip. The 6D’s AF performance is outstanding. In the 5 days of shooting, I don’t think that I had more than 10 or so images that were out of focus. I should sound a note of caution here though. Despite excellent sensitivity, the AF coverage through the frame is poor. For large animals, AF focus point coverage is not critical whereas with smaller subjects, this paucity of sensors may be more challenging.
Another technique that is useful when free diving is to use continuous mode shooting at high speed. Framing, composing and setting exposure settings while diving headfirst downwards and equalizing simultaneously presents a task loading problem. Add into this that the sharks are moving fairly quickly, and you are moving relative to them too. It is easiest to remove one potential problem by shooting bursts of images. The 6D’s limited frame rate is also compounded by its buffer filling after around 15 images and then the frame rate dropping to 1 fps or slower (in RAW mode).
Shooting in Live View mode also makes framing etc. easier in these circumstances by allowing the photographer to use the LCD screen. The principle drawback of the 6D’s Live View mode is that its AF is slower and hunts more than that of the viewfinder mode. If the photographer locks the AF off as described above, this ceases to be an issue.
I did shoot some video with the 6D and was happy with the results. One minor niggle is that there is no option to set Live View and video settings separately. Whatever settings you have dialed in for shooting stills in Live View are carried over in to the video settings as well. This means that you have to constantly adjust exposure settings when switching between stills and video.
The camera does a great job of white balance and exposure in video mode, but it produces significant aliasing artifacts and moireé.
As a hint to those planning similar trips, make full use of custom preset modes. I set two modes, one for surface shooting and one for silhouettes. This meant that when an opportunity presented itself, adjusting the camera’s settings became a one button press, rather than adjusting numerous dials.
The Canon Canon EF 8-15mm f/4L Fisheye USM lens is without doubt the best fisheye lens that I have used. Image and build quality are impressive. On a full frame camera, the zoom range is a pretty good compromise, although it is not as “rectilinear” 10-17mm at the 17mm end on an APS-c camera. Big animals can tend to look “tadpole” like with all head and no tail when shot with fisheye, and while this was the case to some extent with the lens, I was happy with the results it produced. When I look at the EXIF information, I find that the bulk of the images are from the 15mm end which probably explains this to some extent.
Full circular fisheye is something you either like or not. I can see its creative appeal, but do not personally favor it as a technique. The ability of the 8-15mm to capture full circular images should not be underestimated though. It adds to the lenses versatility and opens up opportunities for those that like it.
Housing and dome performance
This was the area that I was most worried about prior to the trip. General familiarity with methods of obtaining exposure, focus and image quality are simple enough to pick up from an instruction manual. But to then put the camera in a housing and access those same controls efficiently is a pretty tall order. Add into the mix breath hold and fairly fast moving subjects and it is perhaps a good test of just how user friendly a housing really is.
One factor in my favor is that I am a Nauticam user normally, so the layout of the housing was not completely alien to me.
I am glad to report that the learning process was easy and I was able to adapt to the different control layout quickly. Within a day or so I was able to adjust aperture and shutter speed settings without taking my eye away from the viewfinder, whilst swimming under whale sharks. I think this serves as a testament to both good ergonomics and a well planned control layout.
ISO is increasingly becoming another exposure setting that I adjust often. I found that the housing’s ISO adjustment, tucked up behind the shutter release, took some getting used to. If the camera control mapping allows, it would be great to see it on a paddle lever, or a thumb operated button.
I find the paddle levers that Nauticam is using for key functions to be great controls. They fall to hand easily and are a positive large surface. The “new” multi controller does exactly what it is meant to and allows for diagonal movement of the camera’s multi-controller.
I made the mistake of attaching a 45° viewfinder to the loan housing. While the viewfinder is very good, this type of shooting really lends itself to Live View, and the viewfinder interferes with this. Somewhat stupidly, I had not packed the standard viewfinder so could not switch it out.
Nauticam also lent me their new strobe trigger. Whilst I did not have the opportunity to use it to actually trigger strobes, this apparently may resolve the issue that the lack of built in flash presents for strobe triggering via fiber optic. This assumes that your housing has sufficient clearance over the hot shoe to allow it to fit. The current version does not support TTL exposure control and is only available for Canon. Here is a short video of Eric demonstrating it in action:
The Zen 4” dome proved to be an ideal compromise for this type of trip. It is so much easier trying to swim with a small dome. Corners were a little soft, but as most of the shooting was in mid water, this was not a major issue.
The removable sun shade makes this particular port very versatile and open creative opportunities.
Conclusion
I am in two minds about the EOS 6D. It is a nimble camera and quite capable of producing great images. It is designed to cater for the APS-C shooter looking to upgrade to full frame and is attractive as such in terms of features and price. However, the migration to full frame necessarily includes an upgrade in lenses, and I think that much of the cost saving is lost by the increased expense of better quality glass.
Nauticam has produced a fine housing with the NA-6D, which I, as a non-Canon shooter, could pick up and use successfully with no time for preparation or practice. As I mentioned before, this shows that the ergonomics and control placements are very well thought out.
The 8-15mm fisheye is superb and I wish that I could get an equivalent for Nikon. If you are a Canon user shooting underwater and don’t have this lens in your bag, you are missing out! The Zen DP-100 is an excellent companion to the lens.
FTC Disclosure and acknowledgments
The equipment for the review was all loaned to the reviewer and returned after the trip. Many thanks to Alex Tattersall of Underwater Visions who together with Edward Lai of Nauticam supplied the housing, camera body and flash trigger. Fergus Kennedy kindly lent his 8-15mm lens. Further thanks to Ryan Cannon of Reef Photo and Video and Zen Underwater who also kindly lent me a lens (!), as well as the Zen 4” dome used in the review.
- Introduction, EOS 6D and EF 8-15mm f/4L Fisheye USM lens.
- Nauticam NA-6D housing and Zen DP-100 port.
- In use, conclusions and acknowledgments.