Review: Tobias Friedrich Lightroom Presets by Mike Veitch
Review of Tobias Friedrich Lightroom Presets
By Mike Veitch
If you are like me, you find working on your underwater images to be quite the chore. Don’t get me wrong, I love being in the water and taking photos, but I can’t stand working on images afterward. The tedious nature of finding the right white balance and color correction is something I never look forward to. This is why I was intrigued when Tobias Friedrich announced his set of “underwater presets” for Adobe Lightroom. If this means I am able to press a few buttons to make image optimization a breeze then count me in!
A Few Words About Presets
These are quite popular in several genres including landscape photography and video. They are basically a set of automated “actions” in software that creates a certain look and feel. They normally act as a one time preset that reproduces the style of the “influencer” who is selling them. Simply install the preset, hit the button, and voila! You now have the same look as your favorite YouTube personality.
However, this is not really viable for underwater photography. With so much variability underwater it’s much more difficult to automate a setting compared to a land shot. A “one size fits all” preset rarely works underwater. Therefore, I must admit I was a little dubious about how these presets would work on underwater images. However, after reading more information into how Tobias’ presets work, I understood these are designed differently than a one-touch “plug and play” action.
How Do They Work?
As an underwater photographer understands, lighting and color rendering are never consistent. We all prefer a certain look at our photographs, including the choice of white balance and brightness. This is where Tobias’s presets are a little different. These are not simple “plug and play” effects that create an all or nothing look. Instead, the plugins are designed to be modular. Meaning the user can pick and choose individual “looks” in each module to create a finished product. They can also be used to create a shortcut to a certain look which can be used as a baseline to start adjusting manually.
The biggest difference between these presets and many others is that once you press it, you can see the changes it makes to each setting. In other words, the adjustment to every tool such as saturation, contrast, or shadows is right there in the right-hand panel. This makes it very easy for the user to make slight tweaks in each and every module setting.
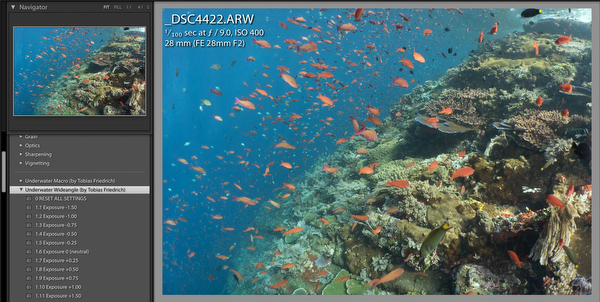
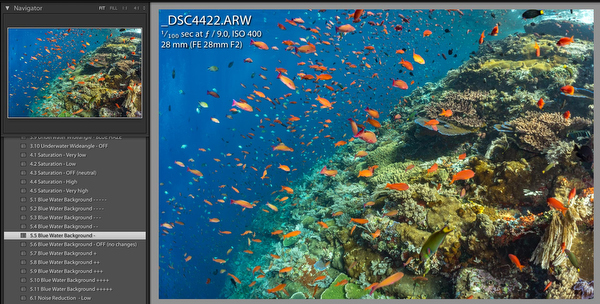
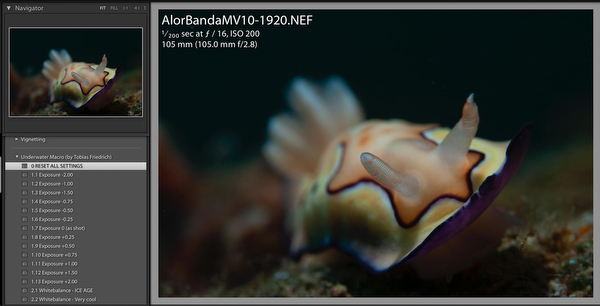
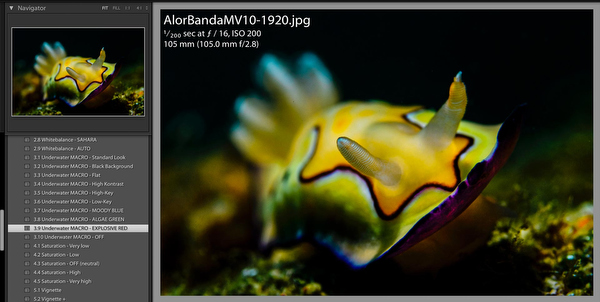
The Layout
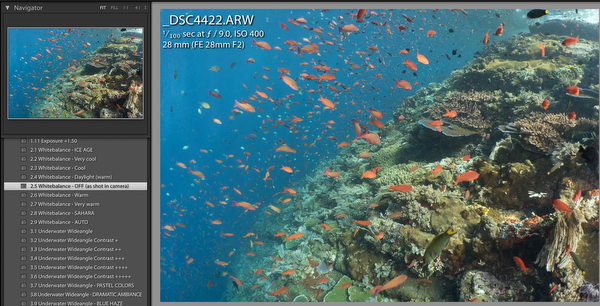
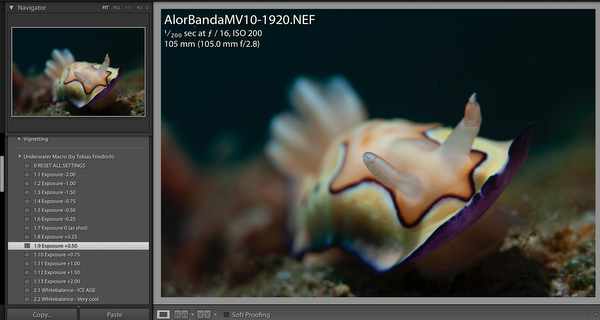
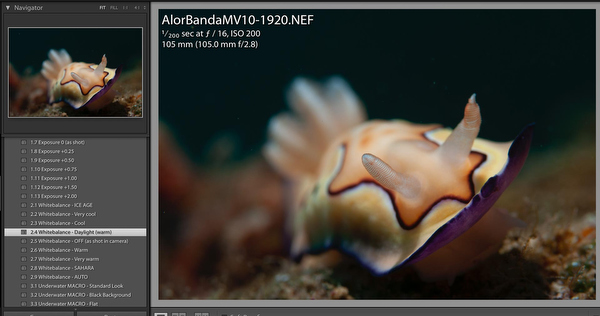
The layout of both the Wide Angle and Macro Presets are straight forward and easy to follow. The installation is easy and a “how-to” is included when purchasing the plugins. Do keep in mind that you will need Adobe Lightroom! Once installed, the presets are found along with the left-hand panel in the “Develop Module”. They are very intuitive as you simply work your way from top to bottom. The modules are in order of the workflow you should follow starting with #1 Exposure. Each module has been laid out in easy to understand the terminology. For example, Exposure can be turned up or down in 0.25 increments. Then White Balance has 9 choices ranging from “Ice Age” to “Sahara” and a selection of warm and cool combinations in between.
The best thing about each setting is that they work with the preview in the navigator panel as well as being previewed on the image itself. Simply hover over the preset with your mouse and you can see the corresponding change. You can click on each setting and if you don’t like it simply click on another. If you are happy with your colors and only want to use the preset sharpening tools then those are included too. Simply put, you can pick and choose the settings you need, you aren’t forced to use A before you can work with B.
The Wide Angle Presets
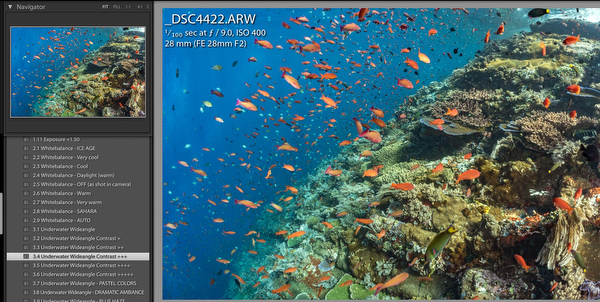
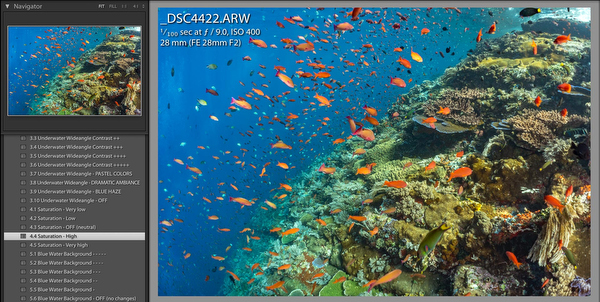
The Wide Angle Presets include everything you need to get the look you are after. There are 7 modules including exposure, white balance, contrast, saturation, blue water, noise reduction, and sharpening. They can all be mixed and matched but I found it works best to move in order from 1 through to 7. The only nitpick I have here is that for my personal taste I don’t see a use for the more extreme ends of each module. For example in “white balance” I can’t see a use for Ice Age or Sahara.
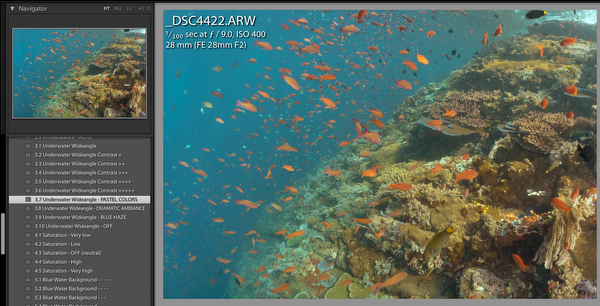
However, for more artistic scenes maybe other people would have some use for these. The Blue Water module is a great one as it creates a nice selection of blues to choose from.
The Macro Presets
The Macro Presets have similar basic modules but also have a few more suited for macro. They are Exposure, White Balance, Underwater Macro, Saturation, Vignette, Noise Reduction, Sharpening, and Lens Profile Correction. The “Underwater Macro” module is an interesting one as it adds a selection of interesting blacks and contrast to the photos.


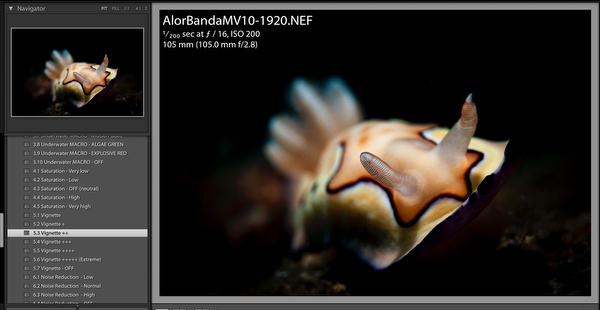
Another module that people will find useful is Vignette. This is one function that maybe not a lot of people use and it can add a distinct look that some users like.
Again, I think the extreme ends of some of the macro settings are not needed, but some people may like to play with them.
Summary
In summary, I think these presets are a great addition to the toolbox of anyone who is not confident with their Lightroom skills. They are easy to install and certainly save time. Being designed by an underwater photographer means that the output settings are created with our “needs” in mind. Settings such as Vignette and Sharpening are more advanced Lightroom techniques that many new users wouldn’t think of using. This means new Lightroom users can play with these settings straight away. With the “one-touch” availability of these tools in the presets, it allows everyone to utilize these settings with the touch of a button.
The presets will save users a lot of time dragging sliders around looking for the perfect balance. The modular system gives the user much more control than the typical single action plugin. Of course, everyone has a preferred look, the best thing about these presets is it allows the user to quickly get close to the look they are after. This look can then provide a baseline to minimize the tweaks needed to perfect it. I think some of the settings at the extreme end of ac couple of different modules are a little over the top but users will quickly realize which ones they don’t need.
Would I recommend them? Yes, although advanced users won’t gain a lot from them, novice users and those who don’t spend much time in Lightroom will find them invaluable. The instant “underwater profile” they provide will create an efficient workflow for anyone.
Tobias Friedrich’s Lightroom Presets are available now, priced at €59 for the wide or macro versions.
About the Author
Wetpixel Moderator and award-winning underwater photographer Mike Veitch is co-owner of The Underwater Tribe, an operation based in Bali, Indonesia that specializes in providing bespoke customized itineraries for visiting underwater photographers and divers. The underwater Tribe also produces a live show, discussing marine-related topics with a wide variety of ocean minded people.