Preview: Sea&Sea 210AR Dome by Morten Bjørn-Larsen
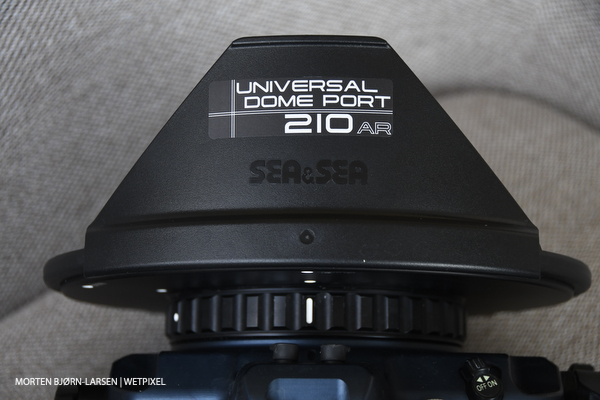
Preview: Sea&Sea Universal Dome 210AR
By Morten Bjørn-Larsen
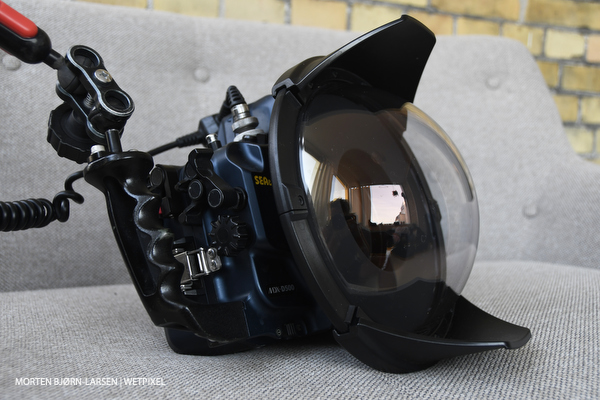
In November 2019, a video on Wetpixel really caught my attention. It was recorded on the Sea&Sea booth during the DEMA show in Orlando, and among a lot of appetizing new gear in the video was a new big 8-inch dome port called Universal Dome 210 AR. I have used a Sea&Sea acrylic 9-inch dome port for twelve years and have been happy with it. The new dome that Sea&Sea was putting on the market is made in a material called Plantex. This is supposed to have better optical performance than conventional acrylic domes and equal optical qualities to glass domes.
The dome has been designed to have the same curvature as a concave meniscus lens. The optical distortion is as little as that of an optical glass dome. The Plantex material is also more durable than acryl and, therefore more resistant to scratches. Lastly, the dome is treated with a multi-layer AR coating to prevent reflection on the inside of the dome.
All these things sounded really appealing to me. I have been considering the beautiful glass domes on the market for a while, dreaming of getting an improved optical performance. But here was maybe what I had been waiting for, as the Universal Dome is much lighter and less expensive than glass domes of this size.
In January (pre-COVID-19), I went to the BOOT show in Dusseldorf in Germany to catch up with friends in the diving and underwater photography industry. Of course. I also went to see and touch all the new shiny gear at the stands. When I came to the Sea&Sea booth, my attention was mostly focused on the Universal dome. Over my weekend at the show, I kept going back to the Sea&Sea stand to see and talk to the staff about the dome - the gut feeling was right!
A short while after I came home from Germany, I went to see my local Sea&Sea contributor, Kingfish, in Copenhagen. I had decided that I couldn’t live without this new dome port. But because of the corona situation, I had to wait a while to get my hands on it.
So, when it finally arrived, I was really excited to try it out in the water. Currently, the diving conditions here in Denmark are not very good. The visibility is limited at around 1-3 meters, and there are strong currents. Instead of dreaming about big scenic wide angle shots, I decided to test some of the features that Sea&Sea promotes for the new Universal dome.
We went out for two shore dives, and I had put my Tokina 10-17mm FE on my Nikon D500. Just as with my old acrylic dome, a 20mm extension ring is needed when using a fisheye lens to get the right distance between lens and dome.
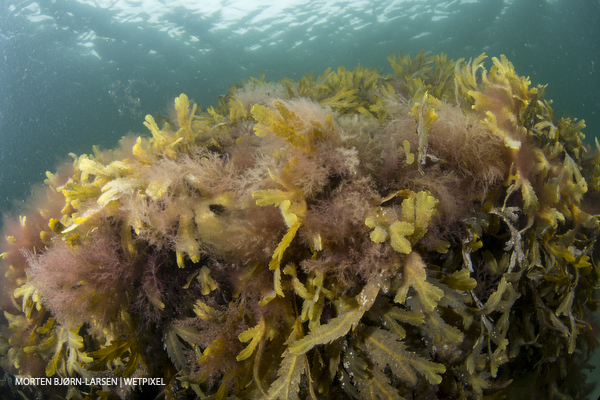
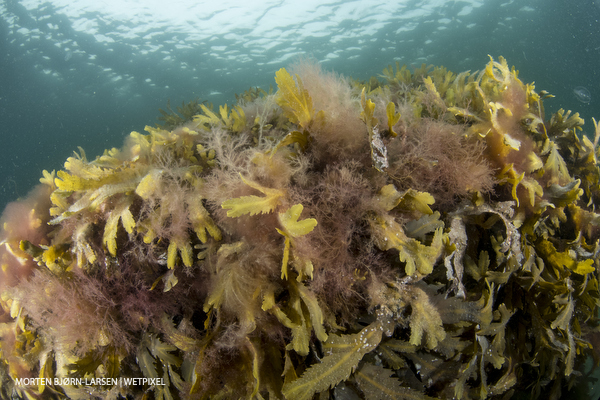
Corner sharpness
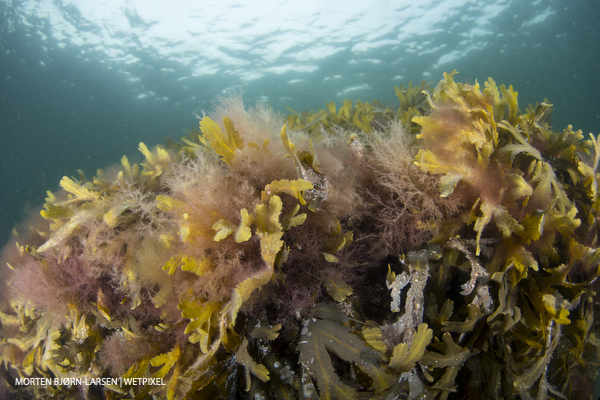
On the first dive, I wanted to test the corner sharpness at different aperture settings. Because of all the particles in the water, I had to get really close to my objects to minimize the water column, but this gave me a chance to shoot images in the same spot while changing settings.


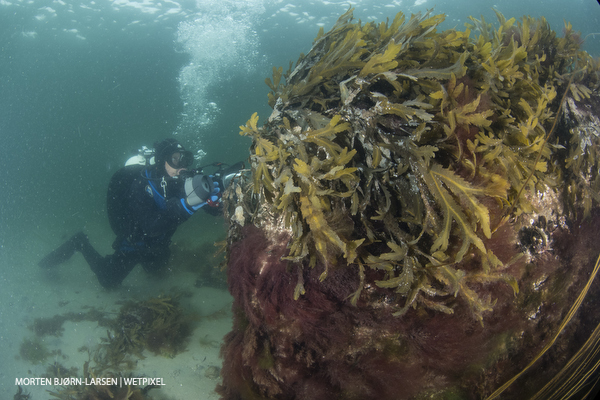
I usually never shoot at f/3.5 unless on a very dark dive. At this aperture, my old acrylic dome would have really soft corners. But now I had fun trying out f/3.5 to f/6.3 and compared the images with the more common settings like f/8 f/10 and f/11. As seen in my pictures, there is a big difference between f/3,5 and f/11, and I would have been astonished if it wasn’t so. But as f/3,5 might still be too soft in the corners for most serious underwater photographers, it is still an improvement to my acrylic dome. At f/6.3, it is already a lot better. If the light conditions were low, I would say that the corners are useable — depending on what and where the image is taken. From f/8, I find the sharpness from corner to corner rather satisfying!
Split level images
Another thing I was eager to test was shooting some split-level images. At first glimpse, I couldn’t find anything underwater to make a more balanced composition to see how the dome would perform with split level shooting. But after swimming back and forth close to shore between two jetties looking for an object underwater, I finally found a moon jellyfish dancing just beneath the surface. I was lucky that the sun was covered behind some clouds, so I could shoot towards the shore without struggling with the July midday sun.
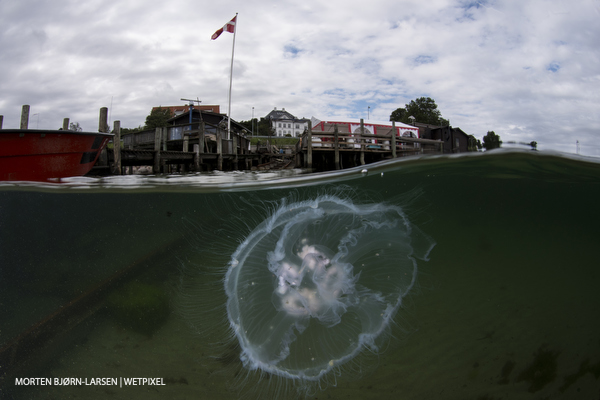
I focused on the jelly and set the aperture at f/16 to get both halves sharp. Then, I pulled my strobes as far back as possible to avoid too much backscatter. Finding the right subjects and getting focus and exposure correct presented the same challenges as any other big dome port. Still, I was thrilled to see how this dome would handle droplets on the top half. I didn’t rub the dome with potato juice, no mask cleaning spray either or any spitting on my new toy, to prevent water droplets on the top half of the dome. I was delighted with how it worked out. Before every shot, I dipped the whole dome, got it up, and had time enough to aim and press the shutter before the thin layer of water on the top half of the dome split up and created droplets.
Reflection
The last thing I wanted to try out was shooting against bright sunlight to see if the AR coating really could prevent reflecting my lens in the dome. At the end of the second dive, the sun came out of the clouds, so I could try to catch the light beams penetrating the water. Sometimes when I have shot images in shallow water framing the sun to have clean sunbeams in the picture, I have been disappointed when I checked them on my computer. The front of my lens was reflected on the inside of the dome, looking like a watermark.
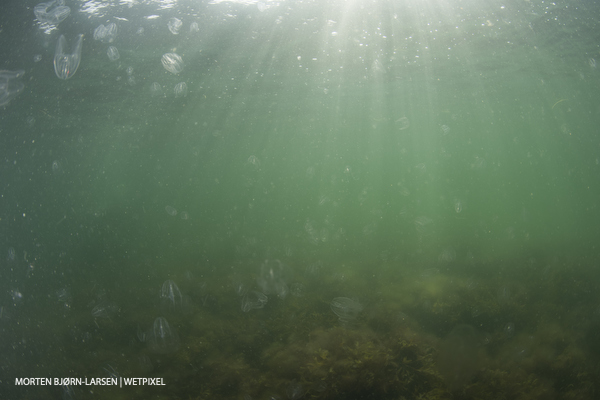
I’m happy to say that I can’t see any reflection on these new images, but I have to conduct more extensive testing before I can say for sure, but so far, so good!
Overall, I am quite impressed with how the Universal Dome worked out on my first two dives in those poor conditions. The dome looks like it may offer a combination of the durability of the acrylic domes and the glass domes’ optical qualities. Now I’m looking forward to seeing how it will perform in warm water with better visibility when the time comes for that day!
About the Author
Morten Bjørn-Larsen is a Danish freelance photographer and writer for dive magazines including DYK, Sportsdykkeren, and Dykking. Mortens articles and photos have also been published in DIVER (UK), SCUBA (UK) Sportsdykaren (Sweden), Scubalife (Croatia), and Unterwasser (Germany).
In 2010 Morten won the bronze medal in the Danish national underwater championship and in 2013 he won the macro category at the Copenhagen international dive shows. In February 2015 Morten won the 3rd place in the wide angle category in UPY - Under Water Photographer of the year.