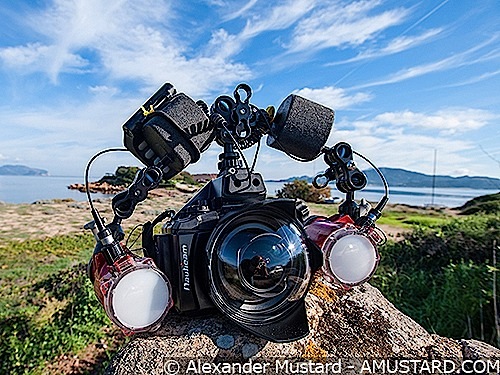
Using the Olympus OM-D E-M5 underwater
Underwater Settings For Olympus OM-D E-M5.
Coroander with Alex Mustard.
Back in May, when I (Alex) reviewed the Olympus OM-D E-M5 for Wetpixel I was hugely impressed by this little marvel, which brings lots of new tech and capability to the popular Micro Four Thirds format. In fact, I went out and bought one.
In short it brings specifications that better most DX/APS-C SLRs and given tiny size of the camera and therefore housings, it has proved a very popular camera in our watery world. Evidence of this can be seen in the number of discussion threads on the forums about this camera, the main here one has already had 20000+ views.
The Olympus way of thinking is certainly different to Nikon or Canon and the OM-D E-M5 is highly customisable through custom settings. It can be a challenging camera to get to know. Many members have been very generous with their knowledge and experience, such a Phil Rudin and Jim Lyle, and have helped many members get the most out of their camera.
However, the reason for this article is to share an extensive set of suggested settings for underwater shooting pulled together by Wetpixel member Coroander, with a small contribution by me (AM). These settings are well worth working through as they aren’t just the basics, but can really transform how the camera performs in a housing.
This is a work in progress, please also see the dedicated Wetpixel discussion thread for the latest suggestions.
The notes below are in two sections. First there is a run through the menus for some of the main settings, then there is a more detailed look at focus. Coroander suggests basing focusing around decoupling the focus from the shutter release, using the record button, which is accessed via a handy lever on the Nauticam housing. On other housings it may be more ergonomic to assign this function to a different button.
(a) Main Menu Settings.
SETUP MENU
Rec View-> 2sec.
This allows the image to be seen through the viewfinder for 2 seconds after it is taken. However, if action is fast, all you have to do is half depress the shutter to cancel the view of the image you just shot. The information presented along with the review image is the same as the current playback (LCD review) mode (press the blue arrow button and then press INFO until you see the info you want to see after pressing the shutter).
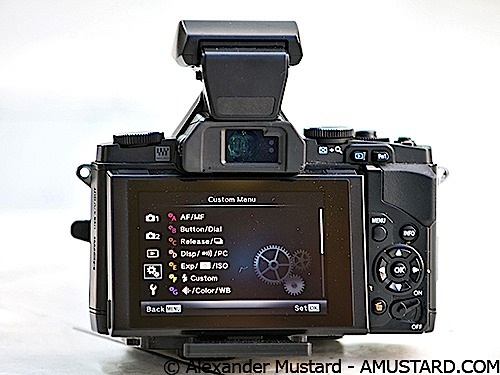
CUSTOM MENU
A. AF/MF.
AF Illuminat. -> Off.
Turning on the red AF light on the camera body isn’t going to help you focus underwater when the camera is in a housing.
Reset Lens -> Off.
Set to Off to prevent the camera from resetting the focus on you.
Face Priority-> Off.
Prevents the camera from taking control of focus to focus on things, which only remotely resemble faces. If your main subject is people (e.g. babies in the pool) you might want to leave this on.
We’ll come back to the other focus settings in part 2 – Focus.
B. Button/Dial
[>] Function -> ISO.
Provides direct access to changing ISO by pressing the right arrow key.
[v] Function -> Flash Mode.
Direct access to flash mode by pressing the down arrow key. Could be assigned to some other function.
[<^v>] Function-> Direct Function
We’ll come back to other buttons in part 2 – Focus.
C. Disp / ))) / PC.
- Control Settings -> P/A/S/M.
- Live Control-> Off.
- Live SCP-> On.
Turning Live Control off and Live SCP panel on ensures that you can gain access to the Super Control Panel by just pressing the OK button. Both control systems provide similar functionality, but the SCP is just easier to use. If you plan to use iAUTO mode underwater, you should do the same for iAUTO mode.
Info Settings -> LV-Info.
- Histogram-> Off.
- Highlight&Shadow-> On.
Level Gauge-> Off.
- Image Only-> Off.
When looking through the viewfinder you can change the information presented to you by pressing the INFO button. By reducing the number of options, you’ll spend less time messing about.
- Histogram Settings.
- Highlight -> 255.
- Shadow -> 3.
These settings control when the highlight clipping and shadow clipping indicators come into play. By decreasing the indicators one can make more use of the excellent dynamic range of this camera and more easily avoid unwanted highlight clipping in scenes with very high dynamic range (where both shadow clipping and highlight clipping indicators are visible).) Note that Adobe Lightroom 4.1 provides excellent shadow and highlight recovery from RAW images that is simply not accessible in most other software packages. Others recommend 250 and 5, which may be safer.
Live View Boost-> On.
Turn this On to prevent the EVF from showing the effects of under/over exposure of the available light.
Info Off-> Hold.
This simply ensures that the information about various settings is always shown in the viewfinder, otherwise it disappears after the time (in seconds) set.
D. [Flash] Custom
X-Sync -> 1/250.
Ensures you can shoot with external strobes up to 1/250 of a second.
Slow Limit -> 1/15.
Lowest shutter speed the camera will use in A, P, and Auto ISO modes.
Also, using the Super Control Panel, set flash power to 1/64 if not using TTL, for fast recycle and longer battery life.
E. Built-In EVF.
EVF Auto Switch-> Off.
Above water this allows the proximity detector to switch the live view from the back LCD to the EVF when your eye is up to the EVF. In a housing this will not work. Underwater, you can switch manually using the viewfinder lever on the housing, if needed.
Frame Rate-> Normal.
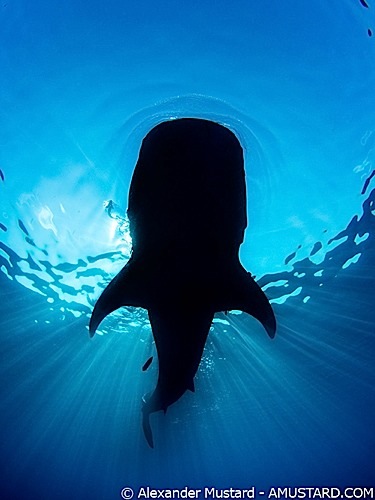
You need to set this to High for action, but underwater the Normal frame rate is much faster than will ever be needed or a strobe can keep up with. When you set the frame rate to High you reduce the ability of the camera to accurately display highlight and shadow warnings; for this reason you don’t want to use High unless it’s absolutely essential. Alex found high frame rate was excellent for shooting whale sharks on this summer’s Wetpixel trip to Isla Mujeres.
SHOOTING MENU 1.
Still Picture-> RAW.
You must shoot RAW to get the full image detail and dynamic range this camera offers.
SHOOTING MENU 2.
RC Mode-> Off.
RC Mode works only with modern Olympus flashes and sends control signals via flash pulses to control the relative outputs of external flashes. Unless you are using an Olympus flash underwater, turning on RC Mode will increase shutter lag, decrease camera battery life, and limit sync speed to 1/160 of a second.
(b) Focus Settings.
This the proposed focus set up for underwater shooting with the OM-D E-M5. Not everyone will want to focus like this, but it is worth trying before discounting this way of using the camera.
This method allows for quick, efficient switching of focus modes, while underwater. With just a single button press one can choose between auto focus on the shutter (normal mode) and AF-ON focus (focus decoupled from the shutter and only on the record button, which is a handy lever on the Nauticam housing). This is more efficient way of switching between these modes than on any other camera I know.
First the Customizable Button Setup:
CUSTOM MENU.
B. Button/Dial
Button Function:
Fn1 Function -> MF.
Allows switching between shutter focus and AF-ON focus modes with just a single press.
Fn2 Function-> Magnify.
Quick access to the magnify function, which isn’t really for magnify use, but rather to gain access to a small focus point for accurately positioned focus points, especially good for macro. Tap once to bring up the autofocus point, hold the button down for 0.5 seconds to cancel this mode. Taping the button a second time will actually magnify the image; do this and then turn the dial until you see 14x; tap again to return to your autofocus point. Now the autofocus point will be very small which allows for better focus point selection. You only ever need to do this magnify and set to 14x once, the camera will remember your choice. Note that the magnify focus point is independent of the main focus point position. To cancel the magnify focus point, hold the Fn2 button down for 0.5 seconds or longer.
[Rec] Function -> AEL/AFL.
Allows the record button (thumb lever on the Nauticam housing) when using AF-ON (mode3) focus.
Now the AF Mode Setup:
CUSTOM MENU
A. AF/MF
AF Mode -> MF or S-AF.
Use MF if you want to focus using the record button (thumb lever on Nauticam housing), S-AF if you want to focus on half-press of shutter. Whatever you chose, you can easily change this via the SCP underwater or with a single press of the Fn1 button.
Full-time AF-> Off.
You don’t want this on for any focus mode.
AEL/AFL:
S-AF -> mode1.
In S-AF focus mode, focus will be on half press of shutter button.
C-AF -> mode3.
In C-AF focus mode, focus will be manual with continuous autofocus available by holding down the record button.
MF -> mode3.
In MF focus mode, focus will be manual with autofocus available by pressing the record button/thumb lever.
C. Release.
Rls Priority S -> On.
This ensures that images can still be taken if focus was not achieved in S-AF mode (or more commonly helpful when the camera is not able to confirm focus, even though the subject is clearly in focus).
Rls Priority C-> Off.
This ensures that images are not taken unless focus was achieved in C-AF mode. Note that this only applies if you are holding down the record button/thumb lever; if you have released the record button/thumb lever, you’ll still be able to take images without focus lock.
Half Way Rls With IS-> On.
This allows image stabilisation to start when the shutter is released half way and thus provides an image stabilised EVF when the shutter is pressed half way.
Focus Modes In Use:
Press OK to bring up the SCP. You can now switch between MF, S-AF, and C-AF. In S-AF half pressing the shutter will focus. In MF pressing the record button will trigger the auto focus. If you have a manual focus gear, you can focus simply by turning the focus knob in this mode. In C-AF you’ll need to hold down the record button (thumb lever on Nauticam housing) to continuously focus on a (typically) moving object. Keep the record button held down while pressing the shutter to ensure the photo is taken while focus is locked.
Pressing Fn1 will switch instantly between MF and S-AF/C-AF (whichever of the later 2 was used most recently).