Sealife Reefmaster DC500 Review
Introduction
I was sent a Sealife Reefmaster DC500 Elite setup for testing. The kit arrived with the camera and housing, tray and strobe arm and the SL960D strobe and fiber optic sync cable. It also came with a SL970 wide angle lens, and lens dock for mounting the lens on the camera tray. The elite kit also comes with a nice soft case with die-cut foam inside. This setup is designed for extreme ease of setup and use - with everything included - so that a novice can put together the equipment and put it to good use right away. The camera also comes pre-installed with a number of underwater modes, for both flash and non-flash photography, which can eliminate much of the settings "guesswork" for a beginner.
Camera
The DC500 is an ultra-compact 5 megapixel camera designed for point and shoot photography. It has no specific manual controls for setting aperture and shutterspeed, instead using a number of preconfigured modes to set the aperture, shutterspeed, white balance, etc. The camera uses SD memory cards and a small rechargable battery. It has nicely designed controls which will be very familiar to compact camera users. As shown in the photos below, it is small and thin as compared to the Canon S400 and it has a big LCD display. The Sealife camera is very similar to the popular Canon SD model and probably uses the same sensor.
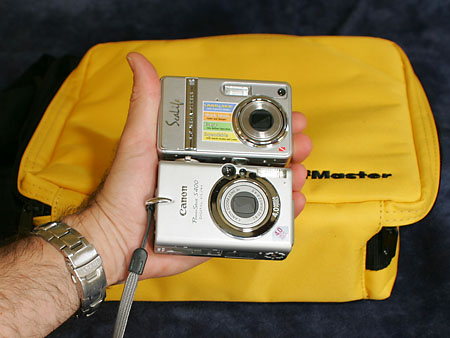
The Sealife DC500 Camera, as compared to the popular Canon S400 Digital Elph.
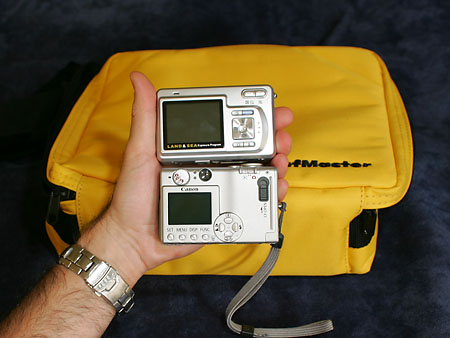
The Sealife DC500 Camera, as compared to the popular Canon S400 Digital Elph.
The DC500 also comes with a convient and easy to use docking station which can be used to connect the camera via USB cable to a computer, and to keep the camera's battery charged. I really like the docking station, as it can be left plugged into AC power and into the computer. The camera can be removed from the housing and inserted into the dock, and it can be charged and transfer photos without opening up the camera to remove the card or battery.
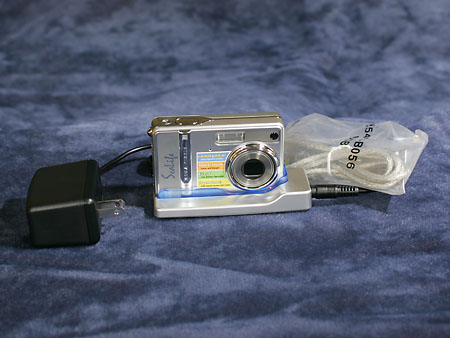
The DC500's docking station, which is used to conveniently chage the batter and transfer photos from camera to computer
Housing System
The system consists of the housing, which can be used as a "stand-alone" or in combination with the camera tray, lens dock, strobe arm, and the strobe. When used for available light photography, the tiny DC500 setup is small enough to fit in the palm of your hand or tuck away into your BC pocket. When the whole setup is used, it can be folded up and is still small enough to clip to your BC when you need two hands for other tasks. The housing is hinged on the left and uses one closure on the right. One of the things I especially liked about the housing is the fact that all of the buttons are labelled. The housing is also rubberized, making it easy to grip and it just feels great in your hand. Inside the housing, there is a specially designed holder for the provided tube of silica dessicant beads, which keeps camera lens and the inside of the lens port from fogging up. The whole system is rated for use down to 200 feet.
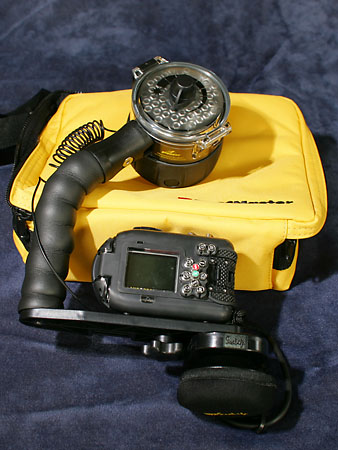
The back of the housing setup, showing the labelled buttons and lens dock.
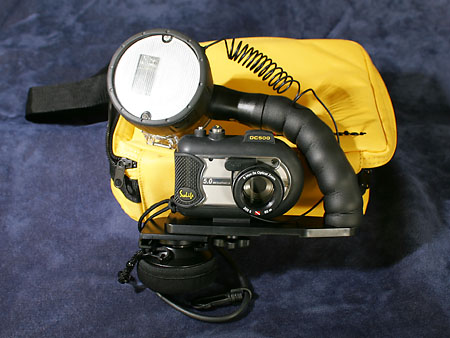
The front of the housing setup, showing the rubberized grip.
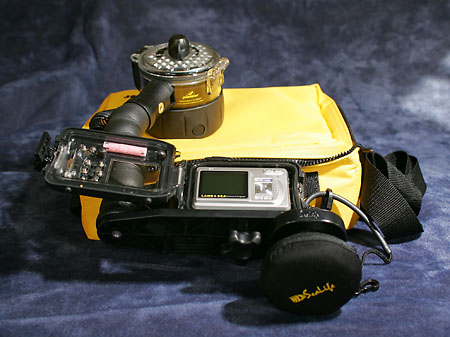
The housing is hinged on the left and a silica bead tube is fitted to the housing rear panel
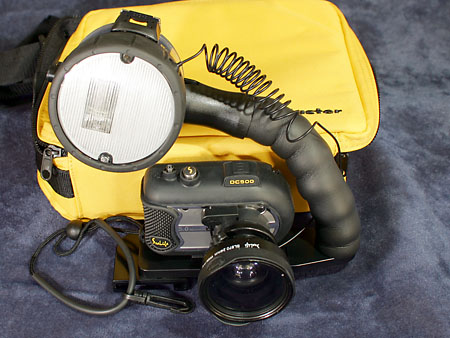
The wide angle lens is compact, and can be fixed to the front of the housing using a bayonet for quick twist and lock mounting.
Strobe
The strobe used 4 AA rechargable batteries. These are inserted into a casette which snaps quickly into the strobe head which means that if a number of casettes are purchased, they can be filled with charged batteries for quick and easy change-outs on the diveboat. The strobe has a built-in slave sensor with an adjustment switch used to control the sensitivity of the slave function. The sensitivity can be adjusted so that the strobe isn't fired by the sun, or by other divers. A fiber optic sync cable is used to send light from the camera's internal flash up to the slave sensor on the strobe head. The cable comes with a mount that snaps onto the camera housing providing a good connection and also masking the cameras internal flash so that it does not create backscatter in the photographs. A rheostat switch on the back of the strobe head can be turned to adjust the strobe's power setting.

The inside of the strobe head, showing the slave sensitivity switch and the battery pack.

The fiber optic cable mount, which snaps over the lens port.

The strobe coverage is adequate for lighting up a large scene.
Image Quality
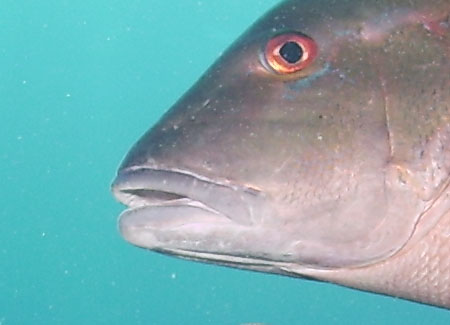
Because I wasn't able to take the Reefmaster diving, Bjorn Harms from Sealife was kind enough to send me a photo taken using the DC500 setup underwater using the strobe and wideangle lens. As can be expected from a consumer camera, there is some noise present in the photo, but images taken at the base ISO and with good lighting and exposure should look nice printed up to 8x10 size.
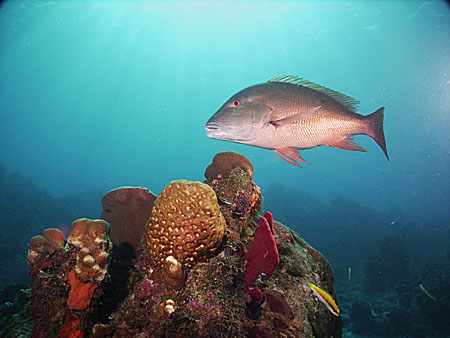
A sample photo from the Reefmaster DC500, taken using the external strobe and wideangle lens
A 100% crop, showing the image quality
Conclusion
The Sealife Reefmaster DC500 setup is a well designed compact underwater entry-level system. When purchased as a package, the housing and strobe setup is easy to put together and use. The image quality is acceptable, and the built-in camera modes make the system adaptable and useful for both above and underwater photography. I would not hesitate to recommend this system to scuba-diving friends who have never used a camera underwater before, and to photographers who are not interested in comparing camera specifications and making complex purchasing decisions.