Seacam 5D Housing First Impressions
I was fortunate enough to receive one of the first Seacam 5D housings to arrive in the States and got it just in time for a one week live-aboard dive trip with Jim Abernethy's Scuba Adventures. This was a Wetpixel trip - an intensive digital photo week of shark diving in the Bahamas , and I had the opportunity to use the Canon 5D and the Seacam housing in a wide variety of challenging conditions – including tiger shark prod…. I also got to do two macro dives at the Blue Heron Bridge in West Palm Beach – a muck diving “haven.” Having transitioned from a Seacam 1D series housing, I can offer some first impressions about this new 5D housing and compare and contrast it to the 1D series setup, which may help others who are thinking of putting together a similar system. This isn't an in-depth review, however I believe it covers most of the areas of interest for potential users.
Size and Weight
This housing is much smaller and lighter than the 1DmkII system. Because the camera does not have a vertical grip, there isn't as much housing underneath the port. This means that it's easier to get down to the subject's level for macro photography, and there isn't as much housing to carry around, and push through the water. This is sort of a moot point if you are using the large Superdome of course. The Seacam housing is still larger and heavier than housings made by Aquatica and Subal, but this is typical for Seacam which makes incredibly tough housings. Having done two macro dives with this setup, I can say that it's easier to handle underwater, and doesn't have as much in-water weight as the 1D series, but it will still require some kind of buoyancy collar to make it neutral underwater. With the Superdome and two Ikelite 200 series strobes, the setup is almost neutral underwater, and probably would be neutral if not used with the S-180.
Ergonomics & Controls
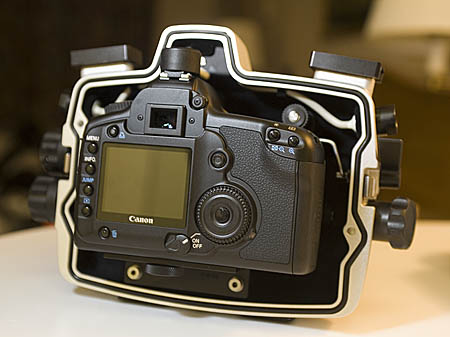
The ergonomics of the 5D body are much better than the 1D series and this translates to using the housing. Many of the functions that required pressing two buttons and rotating a dial with the 1D now only take a single button push and then scrolling with the wheel. For example, to change ISO on the 1D body, you have to depress two buttons and scroll the wheel. On the Seacam 1D, this required positioning one stay-depressed lever and pushing another lever, while scrolling with the wheel. Canon designed the 1D body so that settings would require positive action to change them, so that they aren't inadvertently changed by your shirt buttons (or nose) etc, however, when the camera is inside a housing, this is a “non-issue.” With the 5D housing, to change ISO you press and release one of the top buttons, then scroll the wheel – an ideal solution. The same goes for reviewing images, changing menu settings, etc.
Seacam has released a new handle which is made out of roughened resin composite, as opposed to smooth painted metal. These handles provide much better grip because of their material and the rough finish, but because of their shape, they provide almost no resistance to torque. When trying to use the housing in current, it's very difficulty to twist it back and forth using one hand. For this reason, many users I know in the U.S. use a retrofit handle kit made by Ultralight Control Systems. I'll try this next time, as I have used it before and it works quite well. Note: make sure to continue using the sacrificial zinc plates that sit just beneath the handles and in contact with the aluminum of the housing, no matter which handles you use. They are an important element in the housing’s overall resistance to corrosion.
I found the positioning and angle of the shutter release not to be optimal. I have medium to small sized hands, and I found myself having to reach down and in with my index finger to depress the shutter. It does not fall right under my fingertip as it did with my previous Seacam housing. The same goes for the * button control - it requires a reach. Because the Seacam handles have finger grooves, there is really only one way to grip the handles, and my fingers don't end up falling into the right position. Hopefully a handle-swap and a tweak to the shutter release angle control by Seacam can correct this.
[Update] I fitted my housing with the adjustable Ultralight handles and the ergonomics are much improved. These handles are pretty “fat” and have rubber grip, making it easier to twist the housing around. I am also able to slide my hands down lower on the handle, so that my index finger falls right on the shutter and my thumb lands on the * button control. If the Seacam handles aren't the right size for your hands, I highly recommend you try the Ultralight.
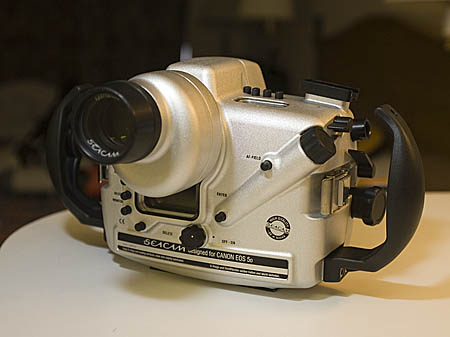
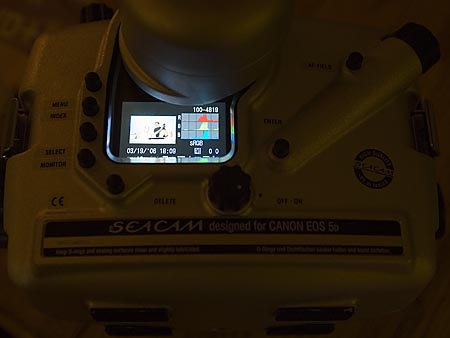
Viewfinder
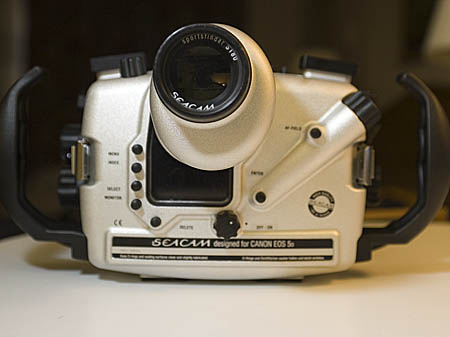
I used the housing exclusively with the magnified S-180 viewfinder. Because of the location of the large LCD screen on the 5D, I was initially worried that the bulge of the finder would block the screen. I was pleasantly surprised to find that this isn't the case – when the housing is flipped down to take a look at the LCD screen only the photo “filenumber” is blocked and the image and the histograms are still visible. As you rotate the housing to take a look at the image, it's easy to see all of the information, including the camera settings, which are cut off at the bottom in the photo below. Other viewfinders (Seacam’s S45 and Pro viewfinder) will reveal more of the camera’s LCD. See http://www.seacamusa.com/faq.shtml#viewfinders for more information about the various options.
Having transitioned from the 1DmkII – which has a large viewfinder – to the 5D, I had to lower my expectations a bit. The viewfinder image through the housing, even when used with the S-180 is not as big as what I was used to. The 5D requires you to place your eye very close to the camera's finder, and this may have something to do with it. I also had to move my eye around a bit in order to find the exposure information at the bottom. The viewfinder combo is still much better than an unmagnified cropped sensor setup.
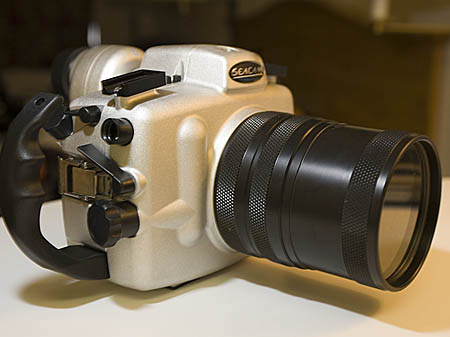
Lenses and Ports
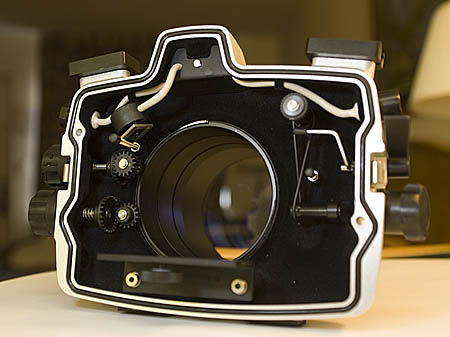
All of the lenses and ports in the Seacam line should be compatible with this camera and housing. I used the Superdome and the PVL120 macro-port on my recent trip. For the wideangle lenses I used, I tried various rings and found that the 24mm F1.4L requires a 25mm extension ring and the 17-40L requires a 35mm ring.
Sample Photos
Below are some sample photos taken with the 5D and various lenses. The image quality from this camera is excellent. It seems to handle sunbursts very well, and it creates sharper images than the 1DmkII – probably because it doesn't have as strong of an anti-aliasing filter. Having almost 13 megapixels to work with is a real treat.
17-40 F4L
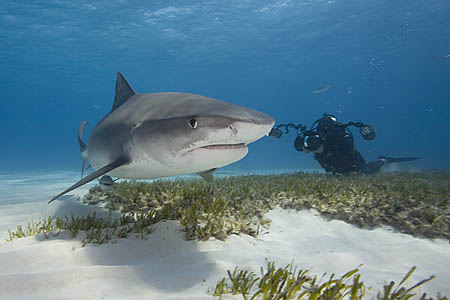
A tiger shark and photographer Dr. Alex Mustard – at “ Tiger Beach ”
24mm F1.4L
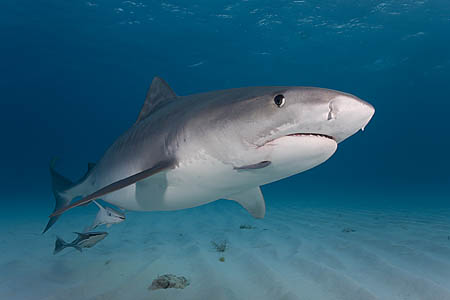
A “friendly” tiger shark at “ Tiger Beach ”
15mm Fisheye
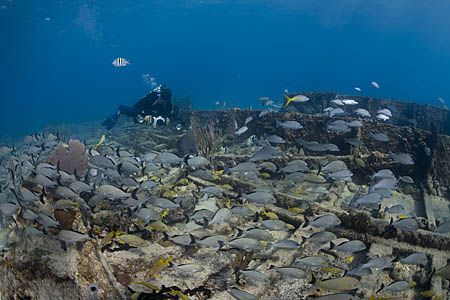
A photo taken using the 15mm lens, and a Magic Filter – at the Sugar Wreck
Sigma 24-70 F2.8
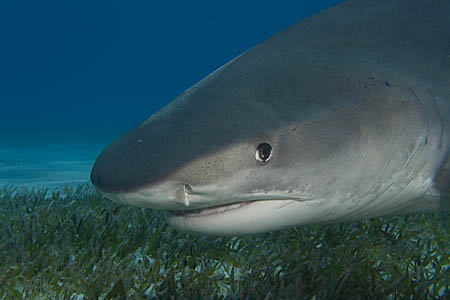
A tiger shark portrait taken over seagrass at “ Tiger Beach ”
100mm F2.8
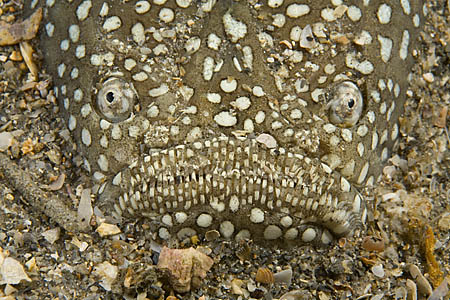
A stargazer fish I found buried in the sand under the Blue Heron bridge in Palm Beach