James Wiseman’s Buoyancy Collar Review
Since I started underwater digital photography, I’ve dove with a number of different camera and housing combinations. The one thing they all shared is that they all had different handling characteristics underwater…:-) For me, the two most important of these characteristics have always been size, and in-water weight. This article describes a way to optimize the in-water weight of your rig – and shows how I made a buoyancy collar for my system.
Background
The submerged weight of a body depends only on the in-air weight of the body and the volume of water it displaces. I could jump into a big explanation of Archimedes principle here but I’ll try to keep it simple and just say: If the weight of water displaced by your housing is more than the housing weighs in air, then your housing will float. A heavy housing that is very compact will have a considerable in-water weight, while large heavier out-of-the-water housings may actually float underwater. When looking at the buoyancy of your setup, it’s important to consider everything that will be used, not just the housing. For example, for a wideangle setup, you’d want to consider the in-water weight of your camera, lens, housing, dome port, wideangle strobe arms, and your strobes. For macro shooting, you’d consider the housing, flat port and any extensions, camera and macro lens, macro strobes and strobe arms.
Another important concept is the center of gravity and center of buoyancy: the former points downward and the latter points up. If the two points are exactly in the same point in space, then a body will not rotate in the water. Usually for most underwater setups, the two points are offset, which is OK if the center of buoyancy is directly over the center of gravity. In that case the immersed body will not rotate in the water. The problem is that in most cases the center of buoyancy of a camera setup is either in front of or behind the center of gravity, and this creates a torque, (a twisting force) which you have to overcome with your hands and wrists.
Everyone will have a different preference, but I personally find a housing that is slightly negative underwater is the best for my needs. I can put it down on the bottom if I need to, and if the rig gets loose and starts sinking, it will do so slowly. When it’s clipped off to my lanyard, it doesn’t float up in my face. I also don’t like a housing setup that twists in my hands when I’m trying to take a photo, but I find a very slight twist is OK.
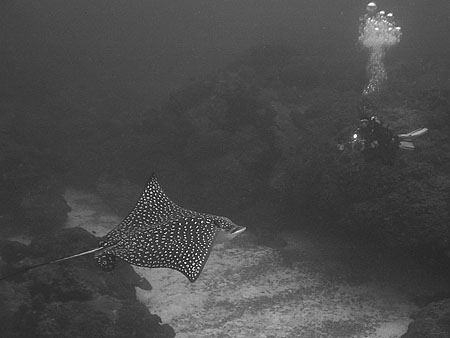
My first macro dive with the MkII setup – of course we saw an eagle ray! Photo Terry Moore
I recently switched setups to a Seacam housing for the Canon MkII series cameras. The housing is form fitting and there is little extra trapped air to add buoyancy to offset the weight of the heavy professional camera and lens. My first dives with the setup showed that the large 9” Superdome and Ikelite Substrobe 200’s did a good job offsetting the weight (Ike 200’s float in water) and the unit was just slightly negative. With the housing set up for macro shooting, the tight-fitting macro port and Inon Z220’s resulted in a setup that weighed literally pounds underwater. I did a few dives with this setup, using the Sigma 150mm + Canon 500D diopter and the in-water weight was so much that I couldn’t hold the camera up and steady it, and I was having trouble keeping my feet down in my drysuit because my camera setup was rolling me forward! After that experience I decided that I was going to have to make some changes to my system before my next trip. On the other hand, when I set up Sarah’s Canon 20D, Ikelite housing, and DS125 strobes, I was pleasantly surprised that the rig was just slightly negative – so at least I was only going to have to find a solution for one of us…:-)
What I decided to do was add buoyancy to my setup such that it would be neutral or slightly negative and not twist around underwater. Using tips from Craig Jones and Bob F. I set out to purchase materials and tools to make a buoyancy collar to fit around my macro port. Because my Seacam uses a very robust thread mounted port, I wasn’t worried about the strong buoyant force popping off my macro port underwater. This may be a concern for others though, so take this into consideration if you decide to put buoyancy onto your rig.
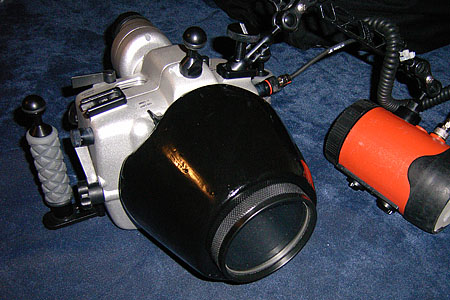
Rather than keep the reader in suspense, here’s a photos of my setup with buoyancy collar attached. It provides just enough buoyancy and in the right place so that I can let go of my housing underwater and it won’t flip over and will just sink slowly.
The completed buoyancy collar, fitted over the macro port for the Sigma 150mm f2.8
Procurement
After talking to a few friends – both underwater photographers and ocean engineers – I decided to make my collar out of Last-A-Foam™ which according to the manufacturer is “a closed cell, flame retardant, rigid, unicellular polyurethane foam.” I selected the four pound density foam, meaning one cubic foot will weigh four pounds. This also means that one cubic foot of this foam will provide sixty pounds of lift in saltwater! The only factor I was worried about was the crush-resistance of the foam, but I thought I could overcome any problems I might encounter by using a hard shell coating. I purchased my foam from Fiberglasssupply.com – here is a direct link to their foam products page:
Core Materials at Fiberglasssupply.com
I purchased two one-inch thick sheets of the foam so that I would have ample supply for experimentation. The helpful folks at Fiberglasssuply.com also recommended a two part polyester resin that is used for bonding the foam together as well as coating it with a hard shell, or as a matrix for a fiberglass coating. They also advised me to purchase a surface hardening agent to make the shell easier to sand and paint. Here is a direct link to their resin products page:
Resin Products at Fiberglasssupply.com
Working with chemicals like these requires great care, so make sure to consult the manufacturer’s website, the Material Safety Data Sheet (MSDS) and always use the proper personal protective equipment (PPE). The author assumes no responsibility for your health and safety. Consult this page at the Fiberglasssupply site where you can purchase PPE:
Personal Protective Equipment at Fiberglasssupply.com
The total cost for my materials, including shipping was under $200, but I’m sure this can be less if you have a supplier in your area, as shipping such a big package is expensive.
Fabrication
The only tools I needed for this project were a hand jigsaw, a rasp, a compass, and some painting supplies. I taped a permanent marker to my compass, measured the diameter of my port, and set the compass up to make circles equal to the diameter of my port. Then I decided on an outer diameter for the rings to provide about two inches of thickness to the collar. Of course the thickness of the collar will depend on how much buoyancy you will need. A quick calculation using pi*[(d-outer)^2/4 - (d-inner)^2/4]*length where d and length are in feet will give you the volume in cubic feet of the collar. Multiply that by 64 pounds/cubic foot to get the overall buoyancy in saltwater. This is of course assuming that you won’t be shaving the collar to a streamlined shape, so keep that in mind when doing your sizing calculation. I used the compass and marker to mark out five rings which I then used a jigsaw to cut out. It’s a good idea to cut out the first and make sure it fits over your port first, and adjust your ring size if necessary.
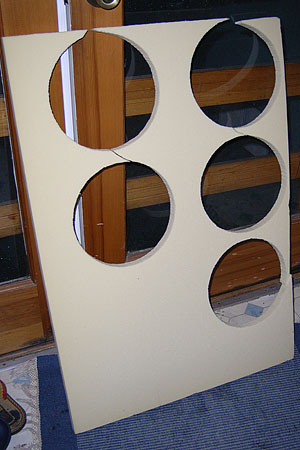
A 1-inch thick sheet of 4# density Last-A-Foam with 5 disks cut out for making a 5-inch long collar
The foam is very strong and stiff and can be cut into even small rings
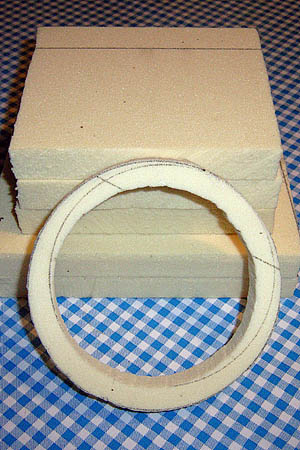
After cutting out the rings and checking their size, I mixed up some resin and used it to glue them all together into a five-inch long tube. I used a small take-away container and a foam paintbrush to mix and apply the resin. Since the resin and hardener give off a lot of heat as they react, be careful where you put the mixing container. Also make sure to follow all of the manufacturers safety requirements.

A two-part polyester resin was used as a glue and coating. A special hardening agent was used with the last coat.
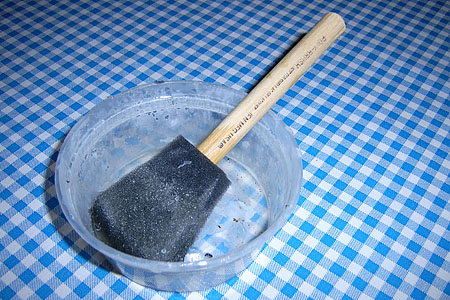
A cheap brush and take-away container was used for resin work
I chose the five-inch length to fit over my port, but leave enough space at the end to fit the Macromate press-on diopter. After the resin hardened, I checked the fit and then put my housing, port, and strobes together in the configuration I planned to use underwater. The next step was to “proof-test” the collar to see how the combined setup would react underwater. Since the collar is made out of a closed-cell foam, it’s possible to get it wet, then dry off the surface with no permanent damage. This meant that I could float the setup in a tub, check the buoyancy, then take it out, dry it off, and make adjustments. After my first dunking, it was apparent that I’d need to take off a considerable amount of foam. I used a rasp to shape the foam into a hollow centered cone, with dished-out areas at the back to access the control levers on my housing. I also flattened the bottom of the collar so that it doesn’t protrude past the bottom of the housing. After a few trips back and forth to the tub and a few tweaks, I’d reduced the volume of the collar enough so that my rig was completely neutral underwater. The other nice result was the streamlined shape of the collar.
I applied 4 coats of resin to the collar, each time sanding the drips off and smoothing out any bumps, paying special attention to the inside surface, to ensure no buildup there would keep the collar from sliding over the port and fitting on snugly. Just the right amount of sanding and coating resulted in a nice snug fit, where the rear of the collar would grip the gnurled rear portion of my Seacam port. Before proceeding further, I decided it would be a good idea to test the collar out on a dive.
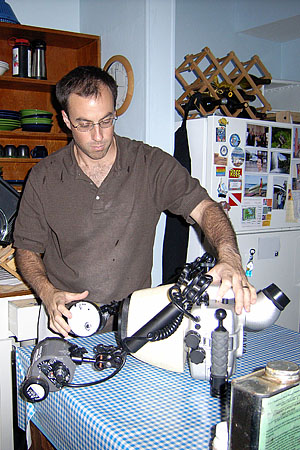
Configuring the setup for testing in the tub. Photo Sarah Bernhardt
Testing and Finishing Touches

The buoyancy collar test fitted after a few coats of resin and some sanding. Care must be taken that resin build-up doesn’t make the inner-diameter of the unit too small to fit over the port.
The reason I wanted to test my newly configured setup out on a dive was to see how the foam would stand up to the hydrostatic pressure at depth. I also wanted to see if the collar added significantly to the system’s drag. The first dive to 100 feet proved the collar could take the pressure. There was some deformation on the back surface, where the foam was pushed in about one millimeter, but there was no cracking in the coating, or major damage. The collar remained unchanged for the remaining six dives on the trip.
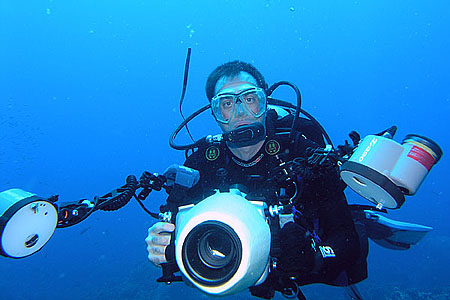
The author testing the system on a dive at the Flower Garden Banks. Photo Dennis Fanning.
When I returned home, I decided the collar didn’t need any changes, and was ready for the final coating. I decided I needed a durable black paint, to make the collar “inoffensive” both to other photographers, and to the marine life I wanted to photograph. My first stop was a boating supply store, as they carry tough water-resistant paints. I ended up selecting a flat black “boot stripe” paint made by West. “Boot stripe” is not the brand of paint, instead, it describes what it is used for – painting the often-rubbed waterline area of a boat with a black “boot stripe.” This paint is extremely abrasion resistant, and best of all, it comes in a small can, as most users don’t need very much of it. For my final coats, I devised a simple stand to hold the collar while I painted it – so I could coat the whole thing at once. My last step was a trip to Target (or your junk-store of choice) to buy a hard Tupperware bowl to transport my collar, so that it wouldn’t get crushed by the baggage-monkeys while traveling.
A Tupperware bowl holds the collar perfectly and protects it for transport.
Conclusions and Recommendations
After a three week trip to Bali, where I took literally thousands of underwater photographs (90% of them macro) I can say that the buoyancy collar was an essential item – as important to me as my lenses or strobes. Shooting super-macro at >1:1 with a long heavy lens, I could easily hold the housing with one hand and it didn’t put any strain on my hand or wrist. Because of the shape of my collar, its center of buoyancy is far back, yet still out in front of the center of gravity of the housing. This allowed me to position my strobes out in front of the port, with literally no upward or downward twist. The collar did suffer a few dings - as we were shore-diving – but the closed-cell foam did not absorb any water through the dings. I did make one dive to over 100 feet and the collar suffered a bit more permanent deformation, but the coating didn’t crack. Both of these types of deformations can probably be mitigated by using six pound density foam which I’d recommend for future projects.
If you are interested in making some kind of buoyancy module for your underwater camera system, I encourage you to try making a closed-cell foam ring to fit around your port, or around your strobe arms. For a few hours of work – which I found to be a lot of fun, especially shaping the foam with a rasp – and less than $100 you can make a useful underwater photography tool, and one that will help you make better photographs.
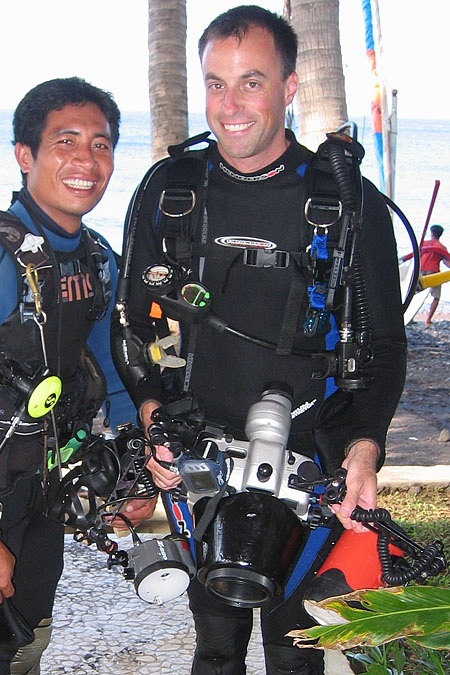
The author and Diving 4 Images guide Yan - at Scuba Seraya in Bali – ready for a super-macro shore dive on the house reef. Photo Sarah Bernhardt.