Correcting Chromatic Abberation using Adobe Photoshop CS
When Adobe came out with their newest version of Photoshop, called �CS� short for Creative Suite, digital photographers (at least this one) breathed a sigh of relief. This software package comes with a RAW format converter called Adobe Camera RAW (ACR). This feature rich converter is constantly updated by Adobe, to provide the best possible RAW conversions for most, if not all, of the popular digital cameras. Each time I use Adobe Camera Raw (they are up to version 2.2) I find a new and useful feature that pleases, if not amazes me.
In this article, I'd like to talk about a photographic feature that until now has only been available through special third-party software � chromatic aberration (CA) correction. CA is an optical defect that is inherent in all camera systems to some degree. CA occurs because the different wavelengths of light � from red to violet � bend as they pass through port glass, and lens elements. The spectrum of light spreads out after passing through the lens materials resulting in colors bleeding to one side or another of a sharp line or boundary. Since it's a function of the lens and port used, CA can occur when shooting using a film camera, OR a digital camera. The advantage for digital shooters is that this aberration can be corrected when converting the RAW file (the digital negative) to a photograph. CA usually does not show up in the center of a photo as light does not have to bend as much; generally, lines will be sharp in this area.
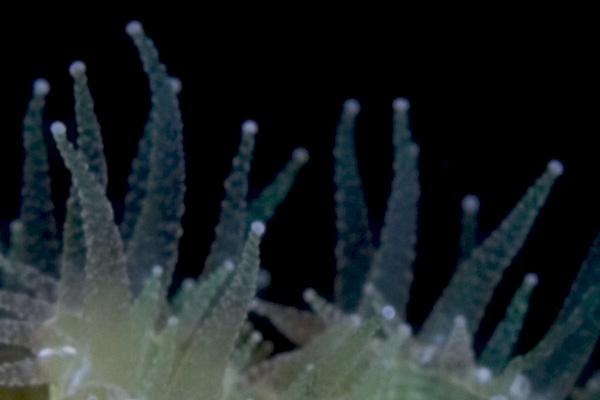
An unsharpened 100% crop from the center of the photo, showing little CA
The following photograph shows a 100% crop of a photograph that has been �tweaked� to accentuate CA in both the red and the violet directions. A consumer camera shooting at 28mm equivalent through a flat port can easily generate CA this extreme.
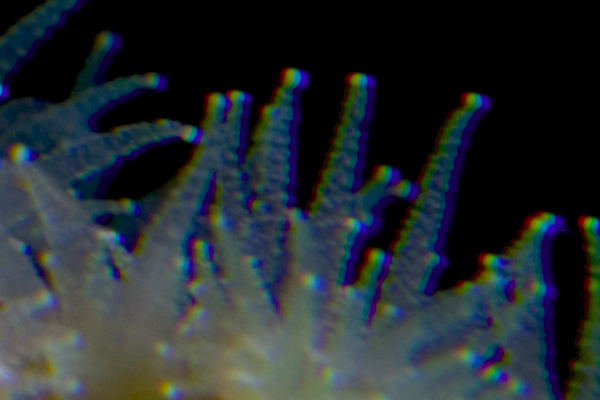
A �tweaked� JPEG showing extreme chromatic aberration
The following photo shows a shot taken on a recent dive trip to the Flower Garden Banks National Marine Sanctuary aboard the Gulf Diving boat M/C Fling. A section near the right side is highlighted and blown up to 100% for closer inspection.
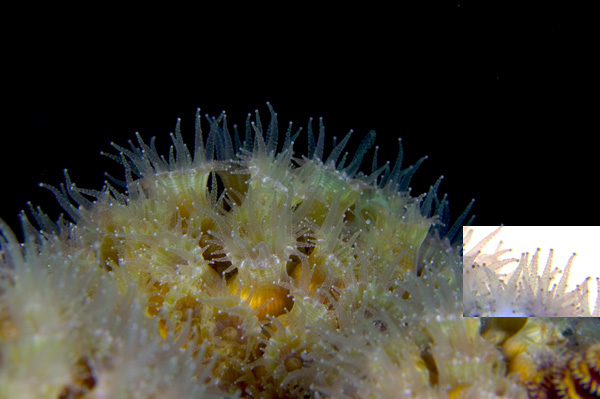
Sample Photo taken with the Nikkor 105mm behind a flat port
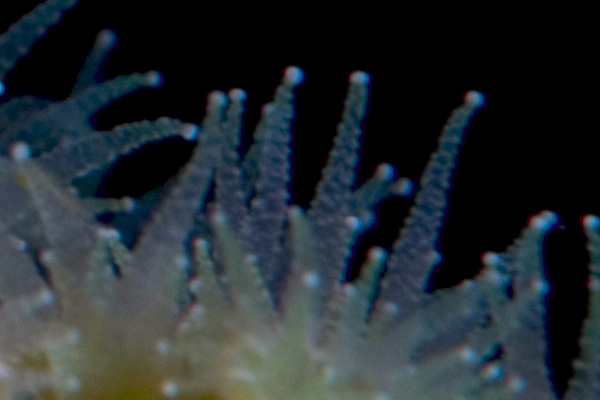
The following photograph (100% crop from the highlighted section) shows the results of shooting a Nikkor 105mm macro lens through a Sea and Sea acrylic macro port. This photograph is an unsharpened 100% crop straight after processing through ACR:
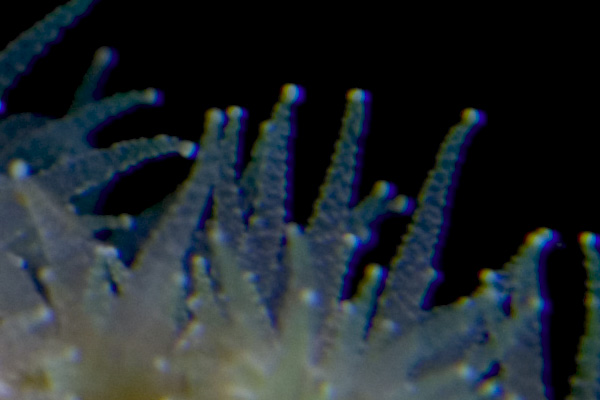
Uncorrected crop taken from the JPEG showing chromatic aberration
When the RAW file is opened in Photoshop CS, the ACR dialog box pops up. If the user clicks on the Lens tab, the CA correction sliders are accessible.
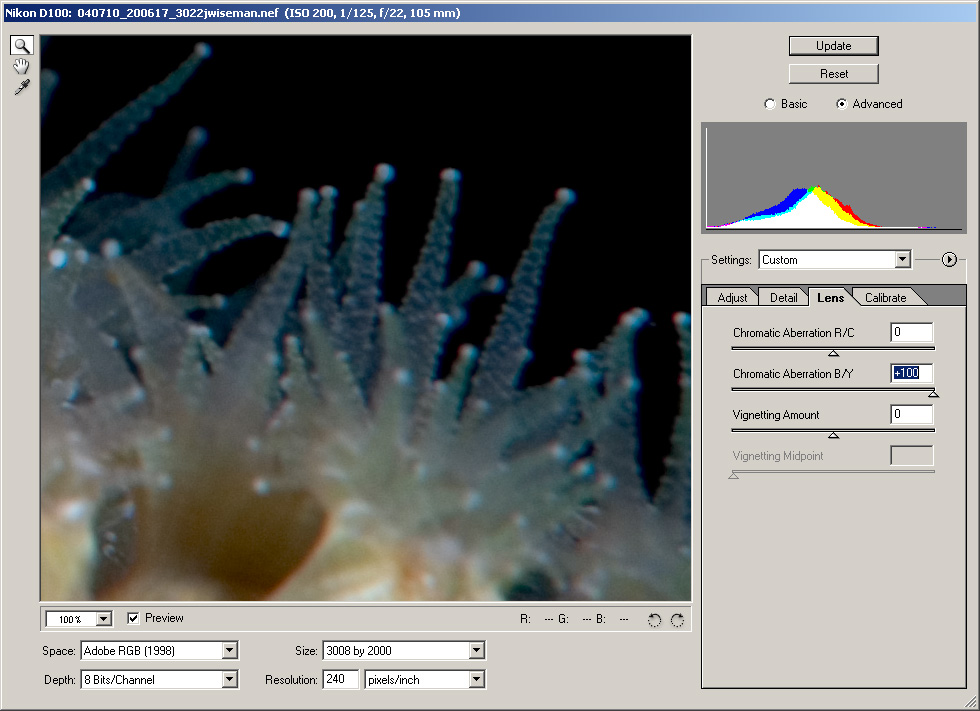
The Adobe Photoshop ACR2.2 Plugin Dialog � showing the Lens tab and B/Y CA set at +100
In this case, the right side of the lines in the photo shows a blue fringe. This effect will vary depending upon the lens and port used, but it's easily detectable and now, using ACR, it's easily correctable. Based on the fact that the fringe is blue, I used the Blue/Yellow correction (B/Y) to bring the fringe back where it belongs � in line with the coral polyp tentacles.
Corrected 100% Crop showing the sharper lines with most of the blue chromatic aberration removed
The finished product, while not perfect (it still needs sharpening, etc) is a great demonstration of the power of the software. Not only is CA correction useful for macro, shooting through a flat port, but it can also be used with wide angle lenses and dome ports.