Canon 5D Conversion Kit for Subal C10 (10D)
As I posted here on Wetpixel a few weeks…months (?) back, my friend and master machinist Bill Reed created a conversion kit for the Subal C10 (10D Housing) to accept the 5D. Well, it is finally done. I will be taking the rig underwater in about a week and a half to test out both the housing and the dome port adapter. The beauty of the kit is that it allows you to retain use of the 10D as a backup body on trips!
There are 3 controls that cannot be accessed by the kit:
- Power: Not a factor as the 5D simply goes into a sleep mode when left “ON” and powers up instantly with a half shutter press - I never turn “Off” the 5D anymore.
- Mode Dial: This was a control that can be enabled however, as I only shot the camera in Manual mode, I opted out of that….I simply placed stickers on the housing to remind me to set the camera to “M” mode.
- Direct Print button: ‘nuff said!
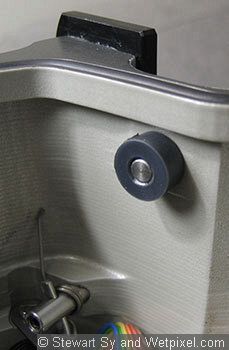
As you can see below, each body is mounted on its respective base tray ready for use in the housing. The secret to the whole thing is the black “L” shaped silicon piece in between the 2 cameras. This is the transfer pad that allows use of the housing controls on the 5D body. If you look closely at the pad, the lighter coloured strips are stainless steel inserts imbedded into the silicon that work as a third class lever. It’s the lever that transfers the motion of pushing the rear housing controls to the 5D, of course, one doesn’t use this pad when using the 10D.
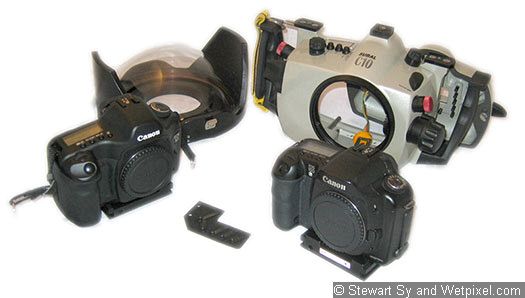
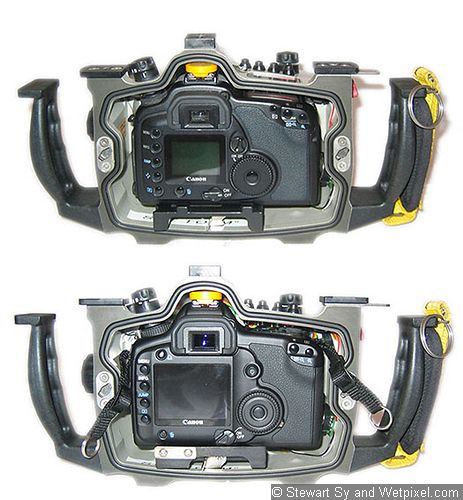
Here’s the 5D inside the 10D housing…from the back, with a shot of the 10D installed as well (hint, the 5D is the one with the bigger LCD!)
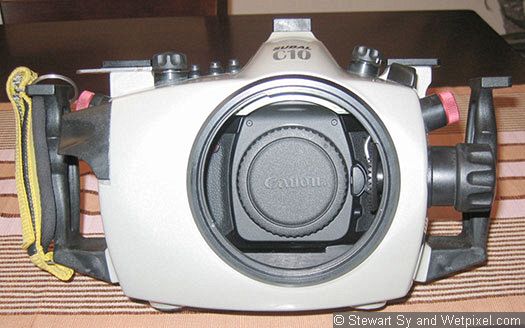
Front view:
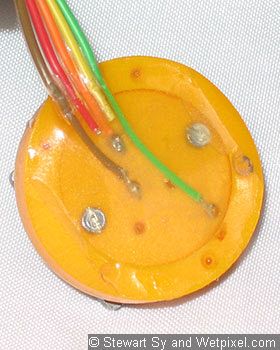
There are two modifications done to the housing that are permanent:
The black hotshoe cover is removed (the 5D is taller than the 10D) and the wires are protected by a 2-part epoxy. The edges of the hotshoe are also shaved down 1mm to make it easier to insert the camera. Note, the wires must be flattened down against the yellow plastic, some of the wires may be sticking up and should be resoldered.
 |  |
Shaved Hotshoe | Mode Dial Cap |
There is a slight gap between the machined cap, so a simple rubber pad can be attached to make the dial work, I may try it at a later date.
The “Transfer Pad” allows use of the housing’s buttons to access the 5D buttons.
Note how nicely the base tray fits on the camera:
There are stainless steel inserts in the silicone pad that aligns with the housing, push the housing buttons and the pad pushes down on the camera’s controls.
The pad is attached by two stainless steel screws to the base tray. The holes in the pad are reinforced with stainless washers imbedded in the silicone, this prevents the holes from ripping open. One can see the capped mode dial just above it.
This is what you see through the rear window:

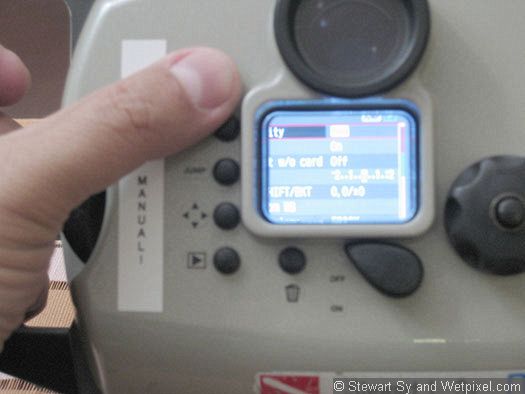
Note, the histogram is fully visible, which is the important part and you can see approximately 85% of the frame…as well as exposure info, while some may comment about not seeing the full image, it must be noted that it’s the histogram info that’s the most important bit to show over and under exposure…in this case, I underexposed the shot of my living room….but I see that the lit focus point is on my wife. ;-)
Here’s a shot just after pressing down on the “Menu” button - the user can easily adjust settings while underwater. Chimping is also possible….as I said, ALL rear controls work except for the power switch and direct print. See the sticker reminding me to set the camera to “Manual!”
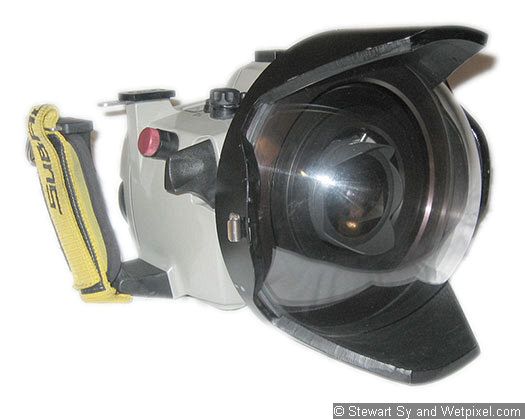
There is no vignetting with the Aquatica dome mounted with the Sigma 15mm Fisheye lens. The adapter is made from anodized aluminum with an O-ring seal. The adapter uses the older thin Subal Orings. The port shade is also made by my friend and comes with a custom flat cover as well that attaches with side clasps. The port covers are available separately for any manufacturer’s dome shade.
I couldn’t get a shot through the viewfinder of the housing with the camera mounted, my antique point and shoot just wouldn’t focus. However, I would say that one can see the full viewfinder image with a mask (yes, I’ve tried it in a pool) and a quick glance down will show the viewfinder info.
The basic kit will be available for the DIY owner for USD$450. That includes the new base tray, transfer pad (additional pads are available for about $30 each, I have an extra, not due to durability concerns but for fear of losing one on a trip! Though if you lose the original one, you’ve likely lost the base tray too!), button extensions for the button in the center of the rear command dial, the “*” and focus point selector, extension pad for the rear command and front command dial, the rear dial pad is removed when using the 10D, but the front pad actually helps even with the 10D.
Prices aren’t finalized yet for the port adapter but it’ll be about $400 or so with the Aquatica 8” dome, $200-250 for each dome shade with cover.
-Stu (scubastu)